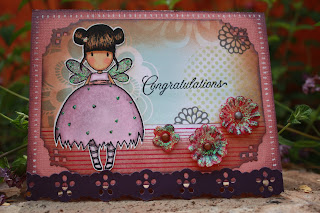
Thank You for your comments and questions! Here is a list of products I used. Below the product list is a brief description of how I did it. Enjoy!
PAPER PRODUCTS:
I experimented with a higher quality paper on Leeta than I used on Mink which allowed me to layer more colors for her flesh, making her obviously more radiant than Mink.
1. THE PAPER STUDIO TEXTURED CARDSTOCK BRIGHTS/lime green base
2. one sheet of scrapbooking paper for background/FAR EAST MAT STACK DCWV PREMIUM STACKS
3. CANSON FANBOY PAPER/for LEETA (love this paper, keeps image wet longer, very easy to blend and munipulate color)
4. 65 LB WAUSAU PAPER/for MINK
5. a scrap pink paper flower & a scrap of white paper for "spring"
INKS: MEMENTO TUXEDO BLACK for all stamps and TIM HOLTZ DISTRESS INK PEELED PAINT for all shadowing and distressing on edges of paper (including Leeta's flower, but not on Leeta or Mink).
MARKERS: Yes I used 99.9% COPICS but I did use a PRISMA (Spanish Orange) for the first layer of Karen's socks. I also used a fine black SHARPIE to touch up Mink's face. Let's start with the skin! Both Leeta and Mink used a basecoat of E11 Bareley Beige with shadowing of E13 Light Suntan. Leeta also has R02 Flesh for her cheeks, a little in her brow and bust. E37 Sepia for both Leeta's darkest eye shadow and for the majority of her boots which are lo-lighted with E49 Dark Bark. Her shoulders are draped in BV00 Mauve and V95 Light Grape. Her dress is RV00 Water Lily with RV91 Grayish Cherry. The second layer of her socks is G82 Spring Dim Green. The soles of her shoes are BV23 Grayish Lavender. Trim and bow on dress are both G82 Spring Dim Green and G21 Lime Green (these colors are so similar, I would use a higher contrast next time). Leeta's hair is E13 Light Suntan. Minks Turn: Hair BG45 Nile Blue, Wings: RV00 Water Lily with RANGER CRYSTAL STICKLES on top (both the wings and on top of the waist band which is V95 Light Grape). Bumble Bee stockings are RVoo Water Lily in wide stripe and v95 Light Grape in thin stripe. Bumble Bee skirt is R85 Red Rose with v95 Early Grape (v95 Early Grape also for the bust of Bumble Bee dress with PRISMA lilac for the shadowing which I don't recommend unless you want a hard line). The butterfly dot in the the "Spring" stamp is R85 Red Rose.
EXTRAS: I also used a lime green brad for the center of Leeta's flower, and a spring attached to the back of Mink so Mink actually pop's out and bounces (hopefully you can tell by the photo).
A BRIEF HOW TO: ATTACHING HEADS TO BODIES
I will be referring to the stamps I used, but of course you may interchange their names with your own stamps and make adjustments for your specifications.
1. Mask Karen's head. I did this by cutting out a pacman shape of paper which was big enough to cover her head while still exposing her neck.
2. Hold the paper in place and apply ink rubber side up.
3. I used a paper towel or even my finger to wipe off any ink which may have been caught by the bottom of her chin or jawline. Do this fast. Calmly, but fast.
4. STAMP!
5. Place a ruler (or something straight) perpendicular and level with the top of her neck (in other words, horizontally with her upright). Pencil mark on each side of her shoulders, about an inch and a half away from the center of her neck. (Just to be clear, your pencil marks are level with the top of her neck and are at least an inch and a half out on either side of her neck).
6. In some way mark the wooden block for where the bottom of Leeta's head is. I put a horizontal pencil mark in the middle of her lips because I was ok with them overlapping the neck a little. You'll see. I'll call the pencil mark across the wooden block the "headline".
7. Ink Leeta's head.
8. Match up the headline with the neckline and stamp!
 WELCOME Crafty Bloggers! This card here is inspired by both the Stampotique Designer's Challenge (for a girly girl project using your favorite stamps) and by the birth of my friend's baby girl!!! What is more girly than a beautiful baby girl?
